

Key Takeaways
- A home theater needs a display, an audio/video receiver, speakers, and source devices working together.
- HDMI is the standard cable for both audio and video; most setups need only a few of them.
- Speaker placement follows consistent guidelines - front, center, surround, and subwoofer each have a defined role.
- Automatic calibration tools built into modern receivers handle most of the tuning work for you.
- Starting simple and adding components over time is a valid and practical approach.
Start here
Understanding the Core Components
Next
Cables and Connections Demystified
Then
Speaker Placement That Actually Works
Almost there
Calibrating Your System for Real Results
Finish strong
Common Mistakes First-Timers Make
Understanding the Core Components
A home theater system is really just several devices working together: a display (your TV or projector), an AVR (audio/video receiver), speakers, and one or more source devices like a streaming stick, Blu-ray player, or gaming console. Each component has a specific job.
AVR (Audio/Video Receiver)
The central hub of a home theater that takes in signals from source devices, amplifies audio, and routes video to your TV and sound to your speakers.
5.1 System
A surround sound configuration with five speakers (front-left, front-right, center, surround-left, surround-right) and one subwoofer for bass.
HDMI ARC
A feature on certain HDMI ports that allows audio to travel back from your TV to a receiver or soundbar through the same cable used for video.
Subwoofer
A dedicated speaker designed to reproduce low-frequency bass sounds, like explosions or deep music, that smaller speakers cannot handle effectively.
Calibration
The process of measuring and adjusting each speaker's volume level, distance setting, and frequency response so they work in balance in your specific room.
Impedance (Ohms)
A measure of electrical resistance in a speaker. Receivers specify a compatible impedance range; mismatches can reduce performance or, in extreme cases, damage equipment.
The receiver is the hub. It accepts inputs from your source devices, processes audio and video, and sends picture to your TV while sending sound to your speakers. Without it, you'd need a tangle of direct connections and lose most audio quality. If you're curious how common terms like HDR and HDMI fit into the broader picture, the Consumer Electronics Glossary covers the essential vocabulary in one place.
Some people start with a soundbar instead of a full receiver and speaker set. Soundbars are simpler to set up and work well for casual viewing, but they have real trade-offs in audio immersion and customization. The article Everything Soundbars Can and Cannot Do offers a balanced look at that alternative.
Cables and Connections Demystified
Modern home theaters run primarily on HDMI cables. A single HDMI cable carries both high-resolution video and high-quality audio between devices - you don't need separate audio cables from each source.
Here's the typical cable path: source device → receiver (via HDMI In), then receiver → TV (via HDMI Out, ideally the port labeled ARC or eARC). HDMI ARC lets your TV send streaming audio back to the receiver through the same cable, so you don't need an extra optical cable.
Label Your HDMI Cables Before Routing
Before tucking cables behind furniture or through cable conduits, use adhesive labels or colored tape to mark each end with the device it connects to. Once cables are hidden, tracing them by feel becomes time-consuming. A five-minute labeling step saves significant frustration during troubleshooting.
You'll also connect your speakers to the receiver using speaker wire - stripped copper wire pressed into spring-clip or binding-post terminals on the back of the receiver. Polarity matters: match positive (+) to positive and negative (−) to negative on both ends. Getting this wrong won't damage anything, but it affects how your speakers produce sound together.
For picture quality settings on your TV itself - including HDR formats that your receiver and source devices pass through - Aspect Ratios, HDR, and Dolby Vision explains what each setting actually changes on screen.
Speaker Placement That Actually Works
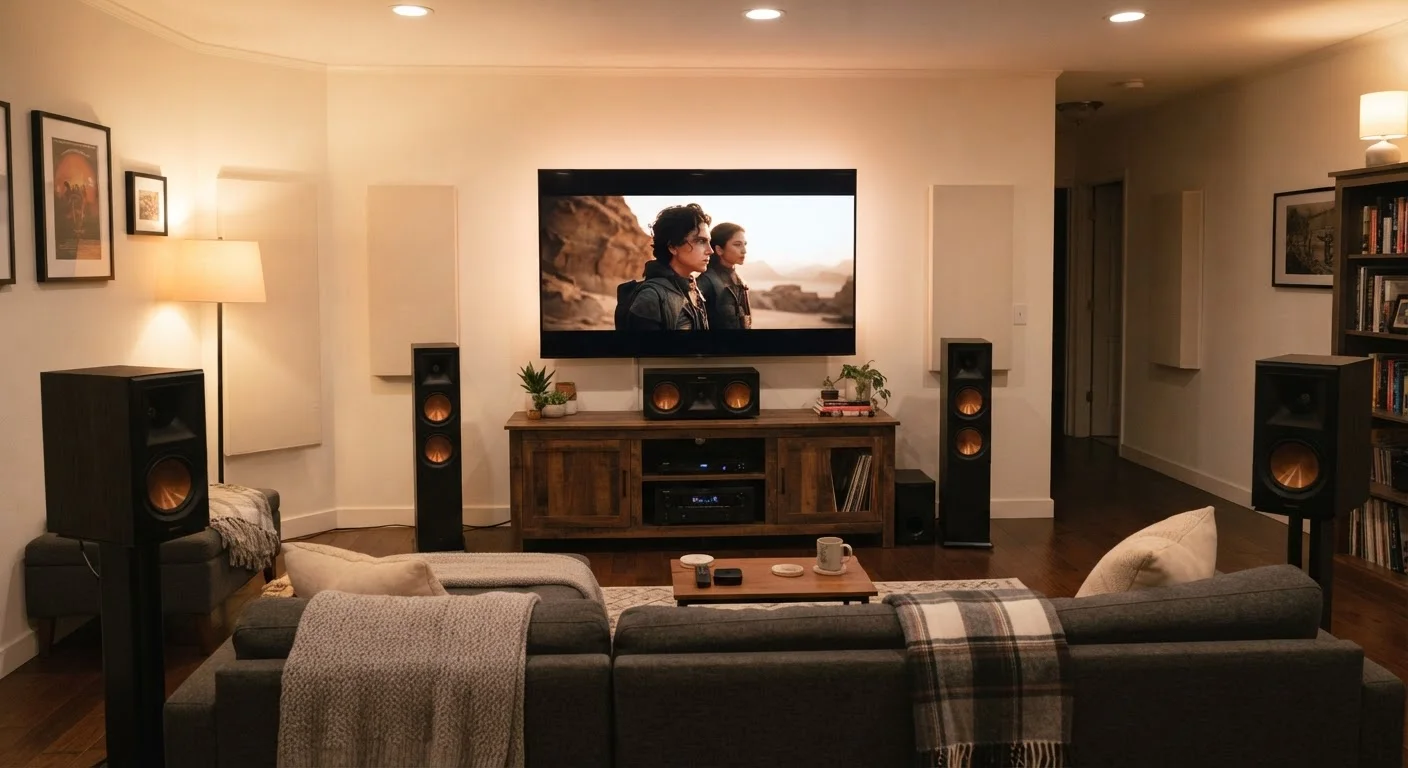
Placement follows a clear logic based on the speaker's role. In a standard 5.1 system:
- Front-left and front-right speakers sit on either side of the TV, roughly at ear level when seated, angled slightly inward toward the listening position.
- Center channel speaker goes directly above or below the TV, as close to screen center as possible. It handles most dialogue.
- Surround speakers go to the sides of the listening position - slightly behind and above ear level - not directly behind you.
- Subwoofer handles low frequencies and is less directional. A common starting point is the front corner of the room, then adjust based on how the bass sounds in your seat.
Room furniture and layout force compromises. If you can't place surrounds on stands, bookshelf speakers mounted on the wall at the correct height work well. The Dolby-specified angles (approximately 90-110 degrees to the sides) are a target, not a strict requirement. For listeners interested in object-based surround formats that add overhead sound layers, Dolby Atmos vs. DTS:X explains how those systems work and what hardware they require.
Calibrating Your System for Real Results
Once everything is connected and speakers are positioned, calibration turns a functional system into a well-balanced one. Nearly every mid-range and higher receiver includes an automatic calibration routine that ships with a small microphone.
The process: place the microphone at your primary listening seat (the receiver stand or a camera tripod works), run the calibration program from the receiver's on-screen menu, and let it play test tones through each speaker. It measures the response and sets speaker distances, volume levels, and frequency equalization automatically. Common systems include Audyssey (used by Denon and Marantz), YPAO (Yamaha), and MCACC (Pioneer).
Calibration Is a Starting Point, Not the Final Word
Automatic calibration tools are accurate but optimized for measurement, not personal preference. Some listeners find calibrated bass levels too conservative, or treble slightly bright. After running auto-calibration, treat the result as your baseline and adjust individual speaker levels or the receiver's equalizer settings to suit your taste.
After auto-calibration, you may still want to make small manual adjustments - subwoofer volume is commonly set a few decibels higher than the calibration recommends, since the microphone captures reflections differently than human hearing does. Use your ears and adjust in small steps.
Common Mistakes First-Timers Make
Knowing what to avoid saves time and frustration:
- Buying speakers before the receiver: Your receiver's amplifier wattage and impedance rating need to match speaker specifications. Choose a receiver first, then speakers rated to work within its range.
- Ignoring room acoustics: Hard floors and bare walls reflect sound and can make audio feel harsh or echoey. Area rugs, curtains, and upholstered furniture all help absorb sound naturally.
- Over-cabling: You don't need expensive cables for digital signals. Standard HDMI cables carry identical digital data regardless of price; spend that budget on better speakers instead.
- Setting all speakers to "large": In your receiver's speaker configuration menu, setting smaller satellite speakers to "small" tells the receiver to redirect low frequencies to the subwoofer, which handles them better.
- Skipping the manual: Receiver manuals, though dense, contain the exact steps for your model's calibration tool and input assignment. A 20-minute read prevents hours of troubleshooting.
If this project overlaps with a larger room refresh, Home Renovation for First-Timers covers how to scope and plan physical changes like wall mounting or cable management alongside other home improvement work.